Continuous integration/continuous delivery for your Xamarin app with VSTS and HockeyApp - Part 2

In my previous post I have talked about how to create a build definition with VSTS and setup your Mac build agent yourself. In this post I will extend that build definition so we can publish our app automatically to HockeyApp. Also I will explain how you can do the same for your Android app, a bit about versioning your app (with many thanks to Richard Woollcott) and talk about other options like Bitrise and AppVeyor.
First, lets deliver our app to HockeyApp so we can distribute it to our fans.
Continuous delivery with HockeyApp #
First let me start with some bad news.

Right now HockeyApp is targeting only hard crashes, which mean; unhandled exceptions. So no fancy graphs, no reporting your handled exceptions, minor user tracking, etc. Also the SDK isn’t ready for forms and it’s structure isn’t great right now.
I’ve been told that the SDK will be updated in a few weeks from now so that’s something, but HockeyApp will not reach feature parity with Insights on the short term.
The other thing has to do with distributing your app with HockeyApp. For iOS you will need to collect your targeted users UUID/UDID. It isn’t a deal breaker, HockeyApp even helps you with collecting it from your users, but it is kind of a bump because you still have to go back to Apple, import the UUIDs, generate a mobileprovision file and get that back to HockeyApp.
So far for the cons. Now there are a lot of pros as well! So let’s just have a look at how we can send our app over to HockeyApp right from VSTS.
Extending the build definition #
There are actually two ways of doing this, add a final step to your build definition or go to the release bit of your VSTS environment.
Both will effectively do the same, but with the release path you will have more control over when a version is released. You can also let someone sign off on the release first, etc. I will describe how to release with the release options in VSTS.
First let’s go back to our build definition. As you can see I have extended it a little since my previous post.
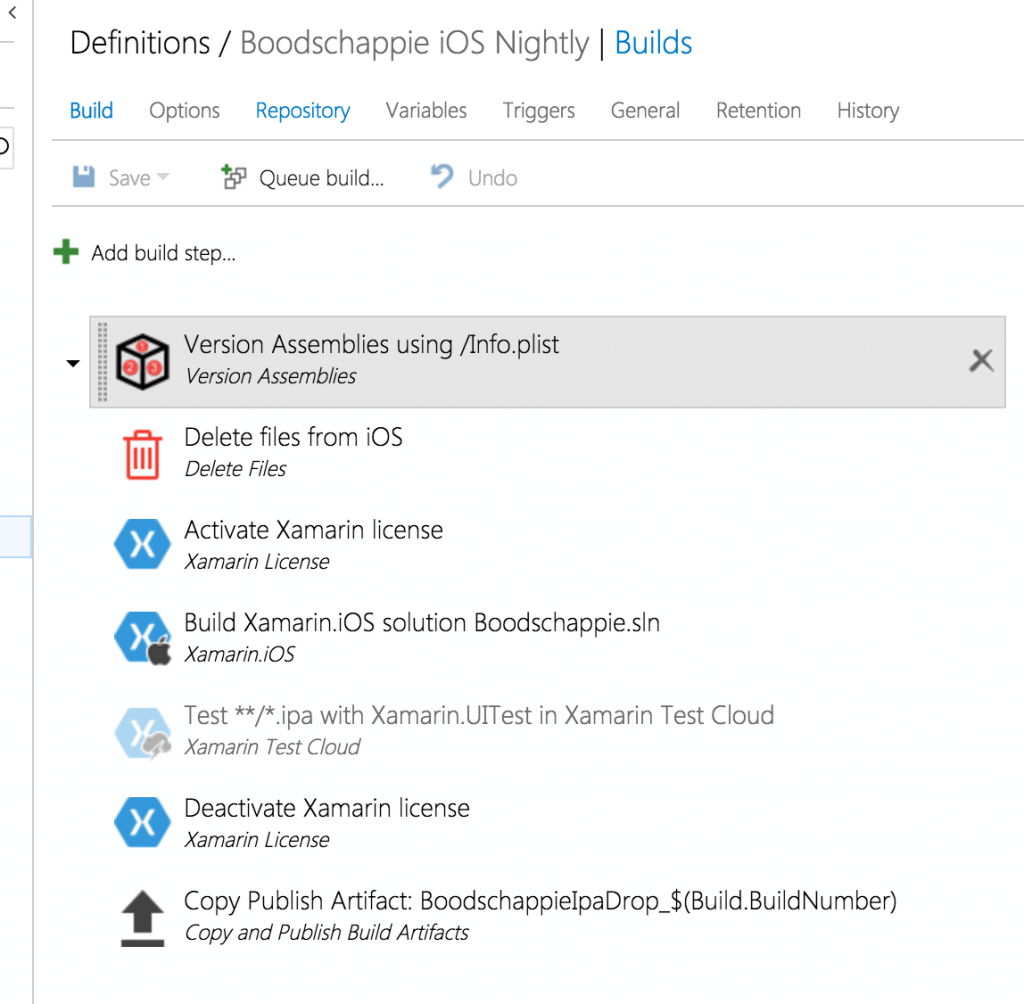
Most interesting here is the first one: Version assemblies.
You want to keep a good record of which versions are being sent out to your testers or even the app store. This is crucial to know when a bug has occurred, one of the first questions will be ‘what version are you running?’. Also, if you have some experience in developing software you’ve probably forgotten to increase the version number as well. So if we’re automating things, why not this as well?
Because Xamarin apps are still iOS, Android and UWP apps when it comes to it, you’ll have to do some different action here depending on which platform you are building. In this case, iOS, needs to update the version number in the info.plist file. This can be done by a simple regex. After fiddling somewhat myself I came across this post: Versioning by Richard Woollcott which perfectly describes it for all platforms. Many thanks!
Also I’ve added a step to delete previous .ipa files. I’m not sure if I screwed something up with configuring but all my builds now go into timestamped subfolders, which effectively leave me with a lot of ipa files. To make sure I get the right one uploaded to HockeyApp I just clear out my artifacts folder of all ipa’s before building a new one.
The Test Cloud step is disabled, I transferred it to a separate build definition.
The last step is one of the most interesting here to make the whole thing work. With this you pack up your ipa (or apk if your doing Android) and publish it as an artifact. You can also take your dSYM file and include that as well, that will give your stacktraces a lot more useful information in HockeyApp. Of course, doing Android and UWP you’ll need the equivalents of these files.
You can grab any file you want by specifying the right wildcards to access them.
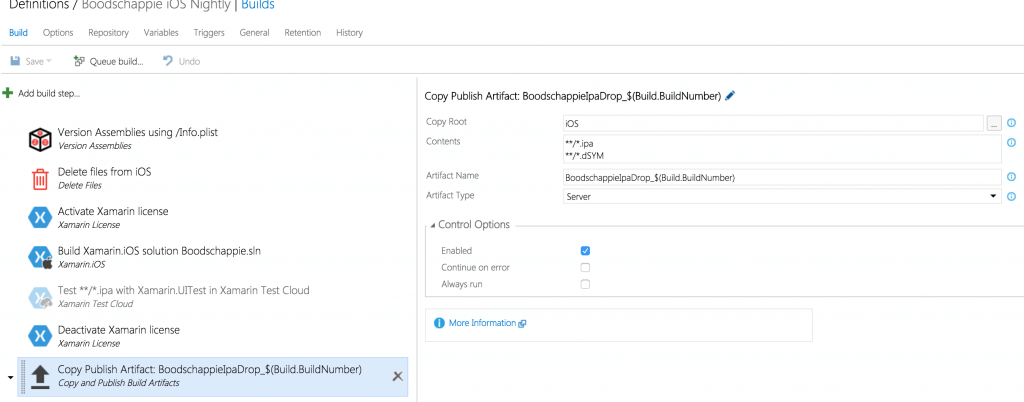
With the Artifact type field you can determine where the artifacts are put. If you use Server it will transport them back to the main build server (probably the TFS web portal you’re looking at right now), or you can choose fileshare and specify a share path where to put them. Of course then you need to have enough rights on the filesystem to do so.
After you save this everything is now ready to be deployed! So save it and head over to the Release tab up top.
Release definition #
Creating a release is very similar to the build definition. Here you can also define steps that have to be executed in order to create a release.
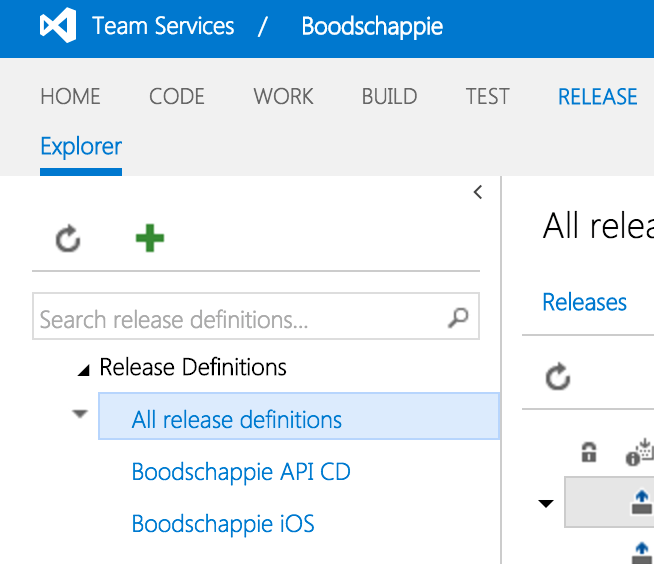
Click on the big plus in the left column to create a new one. Mine will be Boodschappie iOS. Again, Boodschappie is a project I’m working on to be released soon.
When you did click it you can again select from some templates, which are only two at the moment of writing and both have to do with Azure. Since we’re not going to deploy our app to Azure, choose the empty template at the bottom and click Next. Now we need to specify which build definition this release corresponds to, so a release cannot exist without a build definition.
Also, like creating a build definition you can here check the Continuous Integration box, which will cause to create a release every time you checkin code. Whether or not that is something you want is up to you. There are some methods to determine if a release has to be made (by specifying a specific branch) or who will get the created release. We will get to that in a little bit.
After you have configured everything here simply click Create and your release definition will be ready in a second.
Release environments #
If you didn’t notice before; constructing the release definition looks very much alike building your build definition. The same goes for adding steps to the definition, which are actually called tasks for release. There is however one bigger difference. On the left where you are to add your release steps you see an extra column. This is for your environments.
Just like steps you can add environments by clicking the plus button. With this (seemingly simple) functionality you get a lot of control over your release process.
An environment is the platform where you want to release your app to. This can be anything from a zip with your WPF assemblies, your web application deployment package or your ipa file for your iOS app. Because of the variety of different projects you can use this with an environment can be anything as well; Azure, HockeyApp or a file share to name some. Not only can you determine the actual platform to release to, but you can also put in place a mechanism where you assign approvers which can decide whether or not the result of your build is good enough to release to the next environment.
So with this you have a powerful tool to make sure your build goes to your testers first, before they send it over to a UAT environment. Or, release it to a Azure staging slot, run some (automated) tests to see if the application can be reached and acts how it should and only then release it to production. Sweet!
Releasing to HockeyApp #
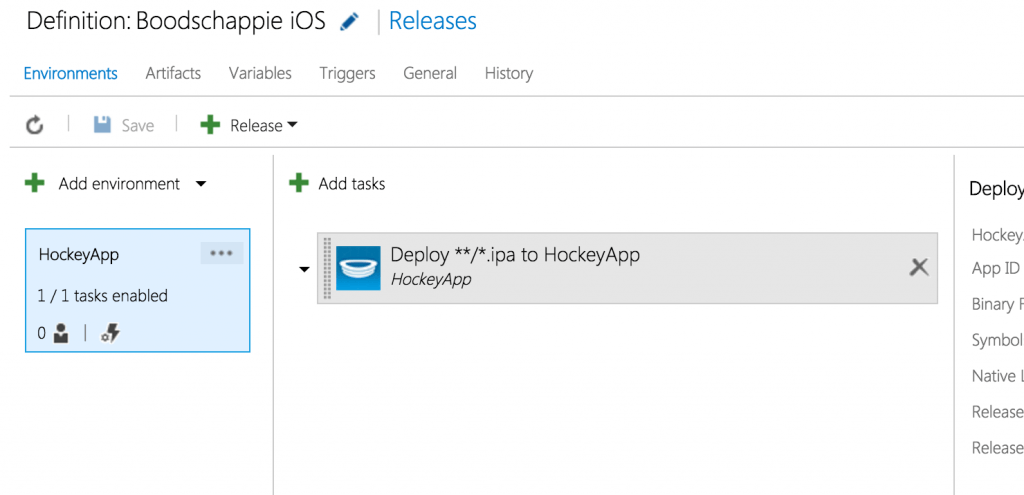
However.. We’re not going to do all of this advanced stuff for now, we’re just going to keep to one environment which gets approved automatically. This is actually the default setting for an environment so just keep it like that for now and click on the Add tasks button.
While you are automatically are directed to the Deploy tab, notice that all other steps tasks are also available to you. You can run some additional tasks if you would like to. Although HockeyApp is part of Microsoft nowadays, the HockeyApp task isn’t in the default task list yet. But not to worry! Microsoft has created a marketplace for everything that has to do with building and releasing. So click the little ‘Don’t see what you need?’ link and find the HockeyApp extension. It should be pretty self-explanatory.
After that find it in the list and click Add.
Now this step requires some more configuring than the ones before. Let’s have a look.
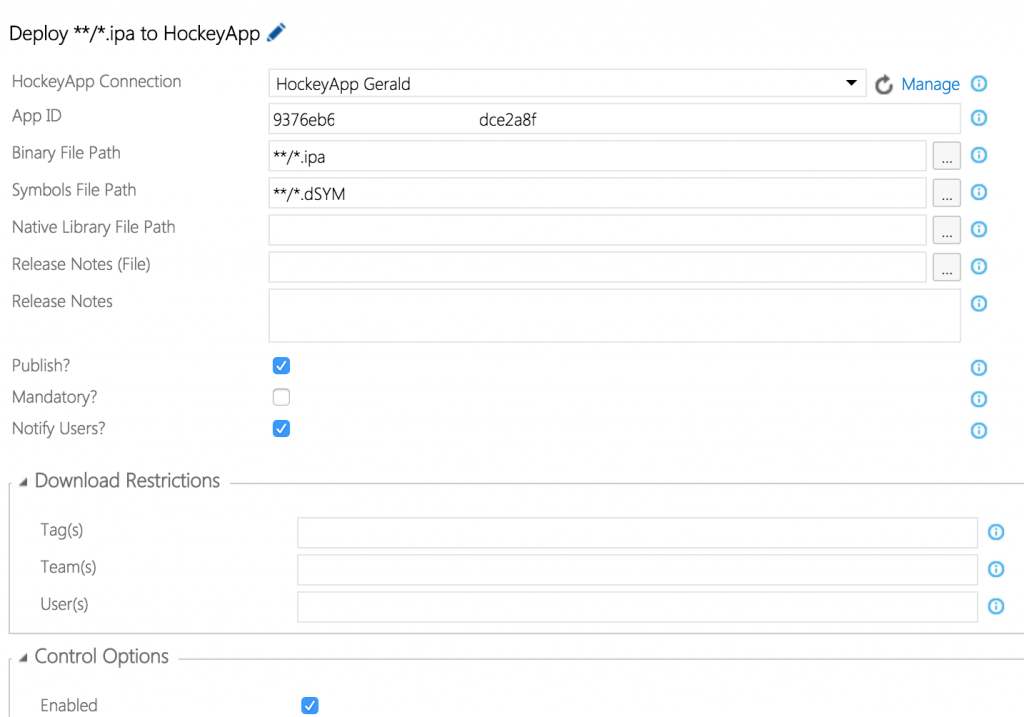
It starts of hard, you need to specify a HockeyApp connection. Whoa! We don’t have that! Now I am going to assume that you have created a HockeyApp account by now. You should also have created a app. Although it is easiest by supplying a ipa or apk file you can also do it manually. Now note the API key in your account settings and the App ID in your app dashboard.
Now to create a connection have a look at this HockeyApp documentation page (doesn’t exist anymore). After you have done this successfully it should be listed in the dropdown under HockeyApp connection. Fill in the App ID in the next box and the hardest part is over already!
The last thing we need to do here is enter a path to your ipa file (or apk if you’re using this for your Andoid app). Because our release definition is bound to a build definition, remember that the file path here follows the structure of the artifact we have dropped from there. In fact that probably makes our life a lot easier because the artifact probably contains only one ipa file we can get away with **\*.ipa which sends any ipa files over to HockeyApp.
Also, for the sake of readable error reports supply your dSYM file in case of an iOS release. Remember; this needs to be in your artifact as well if you want to send it over to HockeyApp!
The rest of the fields are worth a look as well. You can also insert release notes right from your project with a file, notify our (HockeyApp) users and also let the system determine which users get this release by configuring tags and/or teams and/or users. Note; these are HockeyApp entities! Have a play with it!
When you’re all done click Save, name your release appropriately and give it a go. To do this you need to have a successful build from the associated build definition. Now click Release and Create Release.

Now you just need to select the articaft you want to use from that build and click Create. Now you will be taken back to the fancy logging screen which makes you look like a hacker. Closely examine the output to see if all goes well. Like creating a build it will probably take a few tries before you get it right.
But if all did go well you should get an e-mail from your HockeyApp account which informs you that there is a new version available! Woohoo!
Now what is with this Bitrise? #
VSTS is awesome, it is complete and if you’re working with all Microsoft products why not stick with them?
The only showstopper here is that you will need to provide your own Mac or pay for a MacInTheCloud, and I promised you free stuff! This is where Bitrise comes in.
Bitrise.io is awesome! It does everything VSTS does (in terms of building and releasing) and more! I’m not going through describing the whole process here because I’m surprised that you haven’t been bored reading all this stuff by now as it is 😉 If there is enough request I’ll do it in a separate post.
But the account you can create there is completely free and they also provide the Mac needed to build your iOS app! Awesomesauce! Just like VSTS you can completely assemble your own build and release process. And they also have a ‘marketplace’ kind of repository with build steps. Which is actually more complete than the VSTS one right now.
Missing a step? You can easily create them yourself as well!
There are of course some restrictions to the free account, but as a single developer you should be OK for a while so go check it out. Another alternative is AppVeyor. They offer free accounts for all open-source projects. But here iOS apps aren’t supported as a whole unfortunately.
Concluding #
As you can read there is a lot going on in CI/DI world and Microsoft now has a complete suite available to help you inspect the build quality of your apps and release it into the wild! I didn’t even cover testing yet but if you get to play with this be sure to check out Test Cloud which is a powerful tool as well.
If you are one of the lucky guys to understand Dutch, then have look at this webcast I did recenlty about the same subject!
Any questions can be redirect to my mailbox or @jfversluis on Twitter.
Thanks for reading!