ARM Template Deployment from PowerShell on Mac
Besides creating apps, I’m also loving cross-platform as a whole and of course everything Azure. I’ve known Azure Resource Manager (ARM) templates for a long time now, but only recently I started working with them again. My daily development machine is a Mac, so I had to find out how to deploy an ARM Template from PowerShell on Mac. In this post, I will share with you my findings.
What is a ARM Template? #
To quickly touch on the basics, let’s have a look at what an ARM template is exactly. With ARM templates, you create a config file, in JSON format, that represents a certain state within Azure. This means, when you upload that (valid) config file to Azure, Azure will take care of all the provisioning that is needed to recreate that state.
In practice, this means that you can very easy build up and tear down complete environments within Azure. You can work with virtually any resource that is available on Azure, so you can create all the compositions you like. Do you need an Azure Function with a Cosmos DB? No problem! A VM with a certain network configuration and a gateway in between? Done!
If you need some ready to go samples, this is a great resource on GitHub with templates made by the community: https://github.com/Azure/azure-quickstart-templates/
Of course, there is a lot more to the whole ARM template thing, but for this post I’m focussing on deploying them with PowerShell. If you want to read about a certain subject, reach out and I’ll see what I can do for you.
Installing PowerShell on Mac #
The first thing to get the deployment up and running is installing PowerShell. I thought I’d remembered that PowerShell is available on Mac nowadays, of course, due to the magic of .NET Core, and I was right! I quickly found this link on the Microsoft Docs website: https://docs.microsoft.com/en-us/powershell/scripting/install/installing-powershell-core-on-macos
HomeBrew #
There are a couple of ways to install, but the easiest (for me) was through HomeBrew. This is a desktop package manager similar to npm or Chocolatey. You can check if you have it already installed by opening a Terminal window and simply typingbrew. You can see the output, when installed, in the image below.
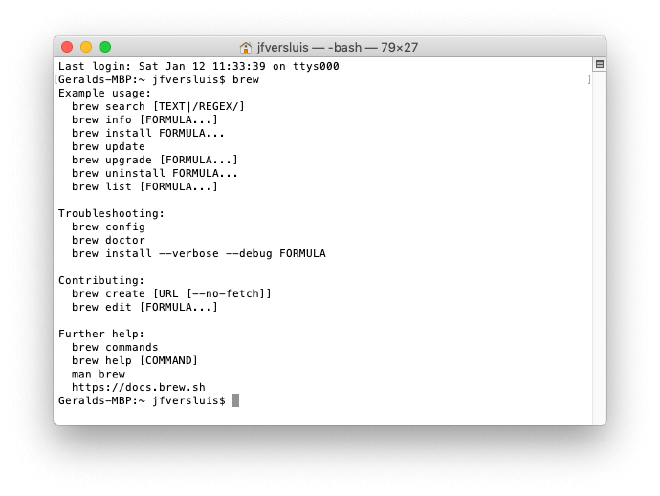
brew command in Mac OS Terminal
If you have not installed HomeBrew yet, you can so so by running the following command in the Terminal. It will guide you through the installation interactively.
PowerShell #
Now, to install PowerShell itself, you can simply run this next command in the Terminal window.
This will retrieve the latest stable PowerShell version for you and install it onto your Mac. After the installation is done, you can simply verify it by running pwsh in the Terminal window. This should open the PowerShell terminal. Don’t worry! It’s not like Vim! You can simply exit again by typing exit.
Installing the PowerShell Az Modules #
By simply installing PowerShell, we are not done yet. We also need to download some additional modules to be able to connect and communicate with Azure. Luckily, these modules are already created for us and we just need to download and install them. Before we start, you will need to run PowerShell with elevated rights this time. Start PowerShell with the sudo pwsh command and enter your password. In the PowerShell prompt, type $env:PSModulePathand hit enter. You will see a path that looks like this:
/Users/jfversluis/.local/share/powershell/Modules:/usr/local/share/powershell/Modules:/usr/local/microsoft/powershell/6/Modules
This output holds three different paths where you can store your modules, each separated by a colon. To make sure they can be reached by all users on this machine, use the last path: /usr/local/``microsoft``/powershell/6/Modules, but feel free to use any of the others if you know whar you’re doing.
Now, to install the needed modules, you need to use these commands, you can paste them all at once or run them one after another:
After running for a little while, the prompt will return back to you and the required modules are installed and ready for use! You can check the list of installed modules with Get-Module -ListAvailable. You should now see a whole list of “Az.*” modules in the list.
To get all the information about the Az module and what it can do for you, go to this Microsoft Docs page. I will guide you through the process for the ARM template deployment.
You can leave the elevated PowerShell session at this point if you want to. Note: there is a lot of documentation out there about the AzureRm module and commands. These are deprecated and replaced by the Az module.
Logging Into Your Azure Account with PowerShell #
The first thing we need to do, is login with our Azure account. To do this, run the Connect-AzAccount command. The terminal will show you a URL and code that you can use to login. Open a browser and navigate to the URL shown to you. Now copy and paste the code and login with your desired account. You can see the Device Login screen below.
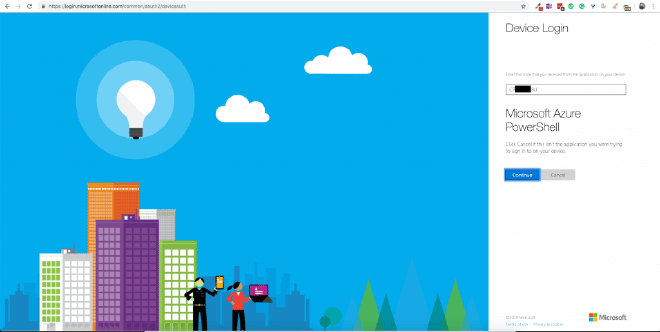
Azure Device Login screen
After you have successfully logged in and head back to your Terminal window, you should see your account listed there. This means you are logged in successfully. To verify that you are connected to the right Azure subscription, you can use the Get-AzResourcecommand. This will list all the resources in your currently selected subscription. If this isn’t correct, list your available subscriptions with Get-AzSubscription and select the right one with Select-AzSubscription -Subscription "Your Subscription Name".
Deploy Your ARM Template to Azure #
Finally! We are ready to deploy our first ARM Template to Azure. But before we do, I guess now is a good time to tell you a little bit more about PowerShell commands and how to find out which are available.
PowerShell Get-Module and Get-Command #
Check out the little Gist below that describes a couple of basic commands that will help you find your way.
With these commands, you can sort out yourself how to do things. The module and command names are pretty descriptive, so it should not be hard to find the right one. Don’t worry though, I will give you the exact commands to get this ARM template deployed, right now.
ARM Template Deployment (for real) #
Before we deploy all the actual resources, we will create a resource group. You can do this by running this command:
New-AzResourceGroup -Name TestDeploy -Location "South Central US"
Of course, the name and location are up to you. Just make sure that the name does not contain spaces or weird characters and the location is a valid Azure value. After you press return, you can go into the portal and see if your resource group is created. This should not take very long. The PowerShell prompt will return to you with the result, this means the command will sleep until the action is fully executed.
When the group is created, it is time to fill it with resources that are defined in our ARM template. Make sure that you have an ARM template that you want to deploy. I got the one below from the repo I mentioned earlier. It deploys an Azure Function with everything that is needed.
Save it somewhere that you have access to and go back to your PowerShell instance. Now, run the following command.
New-AzResourceGroupDeployment -Name ExampleDeployment -ResourceGroupName TestDeploy -TemplateFile /Users/jfversluis/Desktop/ARM/DeployAzureFunction.json -storageAccountType Standard_GRS -appName TestFunction
Again, you will have to give this deployment a name, this way you can easily track it later if needed. You will also need to specify the ResourceGroupName. This is the name I use in the previous command to create that group. With the TemplateFile you specify the full path to the ARM template JSON file and lastly, we supply two parameters that are required by the template itself and not by the command. Note how these two latter parameters start with a lowercase letter. Hit return and wait for the result.
Dealing with Errors #
While writing this blog, I ran into an issue running the above command. Because an Azure Function is public facing, you will have to come up with a unique name for the Function. Normally, the Azure portal tells you that a name is taken, but this is not available when releasing through an ARM template. The output for this command in my case looked like in the image underneath.
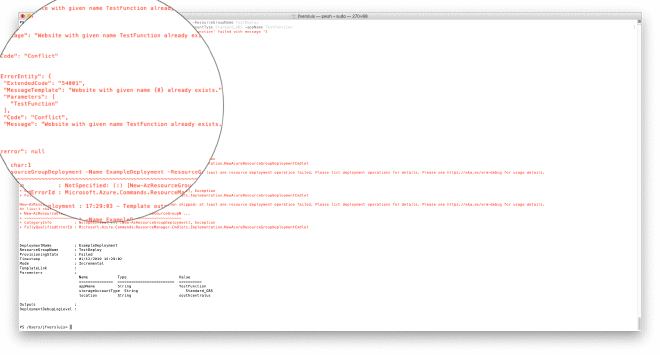
Error while deploying ARM Template
You can inspect this same output on the Azure portal. Go into the Azure portal, find the resource group we have created and select the Overview blade. In the upper-right corner you can see Deployments: 1 failed. When you click it, you will see the same details as in the screenshot of our Terminal above.
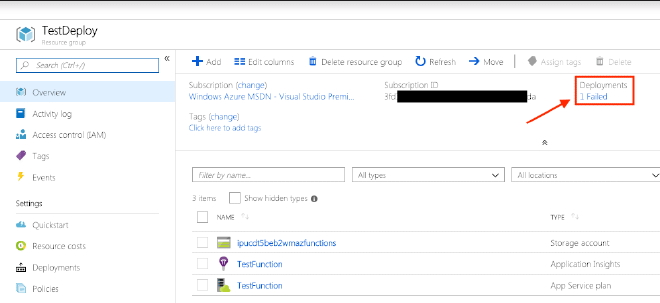
Inspect failed deployment or our ARM template in the Azure Portal
Successfully Deploy the ARM template #
This error is easy to fix, make sure that the Function name is unique and try again. If another error pops up, of course there can be many, correct the mistake and try again until you get it right.
When you resolve all errors, the command will come back telling you that the deployment has succeeded and you should be able to see all the resources from your ARM template in the Azure portal. In my case that is a storage account, Azure Function, App Service plan and App Insights instance.
Incremental and Complete Deployment Mode #
As I have mentioned before, there is a lot more to ARM templates than just what is in this post, but one thing I’d like to mention is the deployment mode. Since this can be pretty destructive, I’d like to point it out to you.
The mode can be either incremental or complete. Incremental means that any resources that are in the deployment group already, but might not be in the ARM template, are left untouched.
The complete mode, will delete any resources that exist in the deployed group but are not in the ARM template.
Also, make note of the properties. Whenever you use incremental, always specify all the properties. If you fail to do so, this will be interpreted as an update and the value of the specified property might be removed in the current deployment.
Conclusion #
In this post, I showed you how to set up PowerShell on your Mac and deploy an ARM template to your Azure account. I hope this helps you get started with ARM templates altogether or doing so from a Mac.
Ideally, when working with an ARM template, you would integrate this into your deployment pipeline. This way, when you have a DTAP pipeline in place, it is very easy to create identical and repeatable environments within Azure. You could even build up and tear down a production representable environment for an end-to-end test if you want to. The possibilities are endless!
I have mentioned the link a couple of times now, but if you need some inspiration, head over to the GitHub repo with the community samples to help you get started. Another possibility is to use the Azure portal to create all of your resources and then find the Automation Script blade. This will give you the ARM template as well as a PowerShell script and even some more options to recreate that resources in an automated way.
Similar but different is the Azure CLI tool that will also allow you to do this. You can think of the Azure CLI as the command-line interface of the Azure APIs. It allows you to control a lot of Azure’s amazing features through an easy to use command-line interface, which is also ideal to use in automated environments.
Lastly, have a look at Microsoft Learn. This will help you learn about ARM templates in an interactive portal, you do need an Azure subscription, but it won’t cost you a cent! If you haven’t done so, I invite you to check it out.