Scanning and Generating Barcodes with ZXing on Xamarin.Forms

Barcodes are still very much present in our daily lives. It’s a quick and easy way to store and read information or show a unique identifier on an object. It is not a big surprise that scanning barcodes is something that is often requested in apps.
While mobile devices often aren’t specialized in these kinds of activities, they are very suited because of the great camera’s that are available. In this post, we will look at how to implement a barcode scanner into our own app. As a bonus, I will also show you how to generate barcode images of your own.
TL;DR you can find the sample code for this post here: https://github.com/jfversluis/ZXingSample
Update Aug. 2019: I have recorded a live coding session that handles this implementation. And created a playlist with some videos about generating and scanning barcodes. You can watch it on my YouTube channel or below. Don’t forget to like & subscribe! :)
The live coding version of this post
Installing ZXing #
The first step is to install the library. Remember that you need to install the package on both your shared code project as well as your platform projects. The package that you want to use is named ZXing.Net.Mobile.Forms. On Android, things are a bit more complicated. Normally, the ZXing.Net.Mobile.Forms package would also install the ZXing.Net.Mobile package. On Android that does not happen at the time of writing. Make sure that you install it by hand because it is needed.
If you want to look at the documentation and project details directly, the GitHub repository is here: https://github.com/Redth/ZXing.Net.Mobile.
Initialization Code #
Android #
To make sure everything is initialized properly, you will need some initialization code. For Android, in your MainActivity.cs in the OnCreate method, you need to add a line of initialization code and also an extra method for handling the needed permissions. More on permissions in a little bit. You can see the end result in the code underneath.
iOS #
For iOS it is roughly the same, only here you will need just the line of initialization code. Place it in your AppDelegate.cs in the FinishedLaunching method. You can see it underneath.
That is all for initialization, let’s have a look at the required permissions.
Adding the Right Permissions #
Permissions is something very important. If you have too few, your app will not work as intended, if you have too many, your users will not trust you or your app and won’t install it.
For barcode scanning, you need at least the permissions to access the camera. If you also want to give your users the ability to toggle the torch, you will need a special permission for that on Android.
Android #
The Camera permission should be added by the ZXing package, if not, open up your AndroidManifest.xml file (under the Properties folder) and add it. If you also want to add the flashlight/torch capabilities, add an entry for that as well. You can see what that looks like in the code snippet underneath.
Together with the method we added in the MainActivity.cs this ought to be enough to handle the permissions on Android.
iOS #
On iOS, we need to add a key to the info.plist file. By adding the NSCameraUsageDescription key, we let iOS know that we want to use the camera. The value of this key needs to be a description that is shown to the user. You might want to state here why you want permission to the camera and what you are using it for. In the code underneath you can see how to add it.
Now that we have everything in place, we can finally start doing some real work!
Scanning Barcodes #
First, let’s see how we can scan barcodes. The basics are very easy.
Full-screen Scanning #
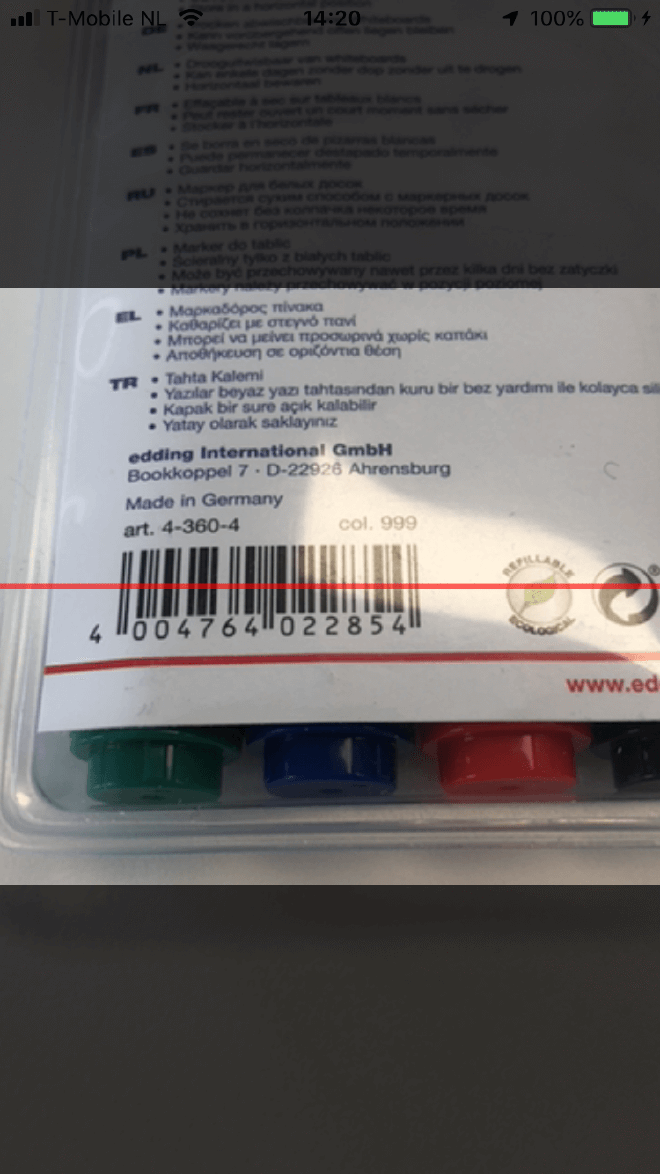
In the ZXing package, there is a ZXingScanningPage for you to use. With this page, you will get a full-screen barcode scanner with a standard overlay that helps your users with scanning barcodes. Underneath you can see the XAML that is needed to set this up and under that a screenshot of the scanning in action.

Full-screen scanning barcodes with ZXingScannerPage
The page has two notable properties IsScanning and OnScanResult. The former is a boolean value that indicates if the scanner is actively looking for barcodes. The latter is the event that is fired when a result is indeed found. Have a look at the code I implemented in the code-behind to show the scanned barcode result in a message box.
While I am using events and simply setting the properties here, you can also use this with the MVVM pattern and bind to the properties. To catch the barcode result when using MVVM, bind to the Result property on the page.
With this method, you can easily navigate to a dedicated page and let the user scan barcodes. Depending on your use-case you can scan continuously or just one barcode, that is all up to you.
Custom Layout Scanning #
To create a more custom layout, you can use the ZXingScannerView. This is basically the equivalent of the page but then in a sizeable component. For instance, have a look at the XAML code below.
In this piece of XAML you can see I embed the scanner view in between to other redundant BoxViews. In this case it doesn’t make much sense, but it shows you how you can incorporate the barcode scanner in only a part of your screen.
The code-behind is exactly the same as the code-behind code of the full page. The event is identical. To use MVVM with the ZXingScannerView is a bit easier than with the page. The ZXingScannerView has a ScanResultCommand property for you to bind to.
Generating Barcodes #
The other part of this library is generating barcodes, which can also come in pretty handy.
To this end, there is another visual element included, the ZXingBarcodeImageView. This is very straightforward to use. Have a look at the sample XAML underneath.
Here you can see how three types of barcodes are generated. There is, however, something strange going on when running this. I have created a sample repository about this issue before.
Blurry Barcode Images #
When using the above code in Xamarin.Forms, the barcode images come out blurry. At least at the time of writing. I have answered a StackOverflow question on this before with an accompanied GitHub repo.
To be perfectly honest, I don’t know why it happens, but the solution is pretty simple. You will have to add a additional EncodingOptions object to your barcode image view. What I suspect is going on is without the encoding options, the barcode is generated smaller, but then gets stretched by the WidthRequest and HeightRequest. By setting these same values in the EncodingOptions, the image is generated with the right dimensions and looks crisp. Have a look at the code below on what the solution looks like.
You will need to add an additional namespace to be able to use this. You can then declare the options as part of your barcode image view. Of course, this can also be done in C# code.
Wrapping Up #
In this post, we have seen how we can scan barcodes and generate barcodes with the help of the ZXing library in our Xamarin.Forms app. There are a few gotchas that might be good to know, I hope I have outlined them in this post. After that, working with the barcode scanner is pretty easy.
There are some other (paid) alternatives. One of them is Scandit, that also has libraries available for Xamarin. If you want to learn more about Xamarin, maybe you want to check out more on how to incorporate PDF files, or learn about SwipeView, CarouselView and animated GIF support.
All code used in this post can be found in a working sample on my GitHub account: https://github.com/jfversluis/ZXingSample