Moving a Git repo from Bitbucket to Azure DevOps

For a customer project, we had to move a Git repository from Bitbucket to VSTS. It took me a little time to figure out how to set up the authorization, so I thought I would make a quick write-up from it.
Update: The original post was written when Azure DevOps was named VSTS. Everywhere where you see VSTS, you can substitute with Azure DevOps. Because of the fast pace at which Azure DevOps is evolving, the screenshots might also be out of date.
On the VSTS side #
In VSTS create a new team project if you haven’t done so and a new Git repository inside the team project. The name does not really matter and does not have to match the name of the original repo. Leave out the README and .gitignore file, we just want an empty repository.
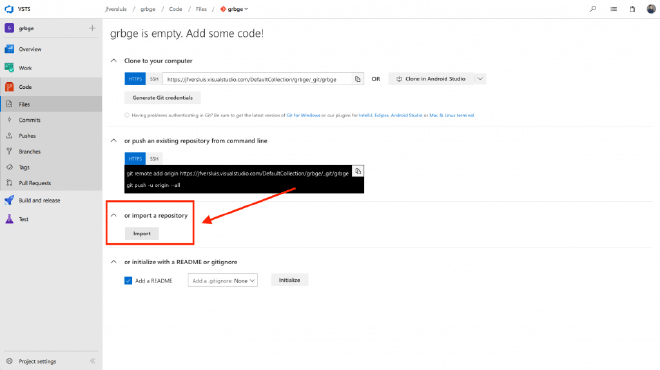
From the getting started page on the empty VSTS repository, find the Import button. In the popup, make sure the source type is set to Git and fill in your Bitbucket repository URL. Of course, this has to be publicly available.

Your Bitbucket repository will probably need authorization. Enable the checkbox for that and head over to your Bitbucket account.
From Bitbucket #
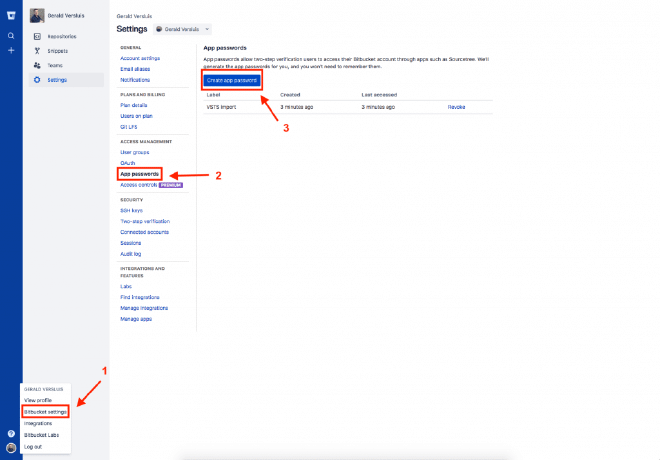
Now, the problem I had is that I use a Google account to log in to the Atlassian suite. While importing into VSTS asks for a username/password and does not support a Google account. The answer to this was rather simple: we have to create a so-called App Password in Bitbucket. Creating this is easy. Go into your Bitbucket account, find your avatar in the bottom left, go to Bitbucket settings. First, on the Account settings blade, make note of your username, or create one if you haven’t done so.
Now, find App passwords to the left and then click Create app password. A popup will show with your newly created password for your Bitbucket account.
The app password is basically a Personal Access Token (PAT) and can be used together with your username to login. Note the password and go back to VSTS.

Back in VSTS #
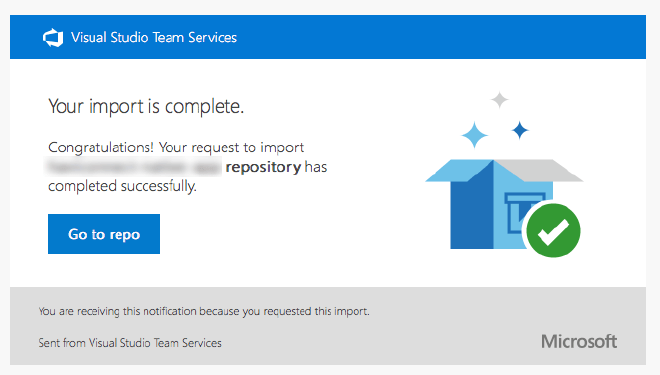
In VSTS our import popup is still waiting on the much-needed details, that we now have in hand! Enter the username and (app) password that we got from Bitbucket earlier and push the import button. Depending on the size of your repository, this will take a few minutes. After it’s done you will receive a notification through e-mail, informing you that the import went well.

Voila! That’s it! Don’t forget to pull the new repository location of course and don’t accidentally push code into your old repo. To prevent that you could delete your repository on Bitbucket, or, if you’re more cautious like me: set it to read-only for a while first to make sure everything was moved OK.