Beauty and the beast - Use MVVM to unleash inner beauty

While your UI is very important (very, very important on mobile!) to your end-user, we must not forget that our project has to be maintainable and thus also has to be beautiful on the inside. This is something the MVVM pattern can help us with.
There are numerous techniques and design-patterns to help us with that. One of them is Model-View-ViewModel MVVM (read more on Wikipedia), which I will cover in this post.
MVVM.. Whaaaat?! #
Many of you probably heard of the Model-View-Controller (MVC) or Model-View-Presenter (MVP) pattern which is somewhat the predecessor of the MVVM pattern. MVVM’s main goal is to separate the GUI from the data and business logic and is a hot topic right now. While I could spend some time explaining why you should be using MVVM and how to do it from in a general way, I will be talking about a very specific framework I have been using in several projects now and how I implemented them in my Xamarin Forms apps.
FreshMvvm! #
The framework I have been using in my projects is FreshMvvm, a simple yet very effective framework by Michael Ridland.
Initially I looked (briefly) at some more established frameworks like MvvmCross and MvvmLight. But they seemed to complex for the task (for now), which seems logical because they are adapted to work on mobile and more specifically Xamarin, while FreshMvvm is designed especially for Xamarin.Forms. Also, but this is a more personal taste, FreshMvvm has a more personal touch to it. Going to Michael’s website you can see his pretty face, he is open to suggestions and answers all of my questions by e-mail, that is just a big plus for me!
FreshMvvm works convention-based, which means that as long as you keep to naming conventions, the View will be matched to the appropriate ViewModel. And that’s where our first difference comes in; with FreshMvvm it is Pages (Views) and PageModels (ViewModels) to be more consistent with the mobile, Xamarin naming.
Let’s find out how easy this all is to implement in your app.
Out with the old… #
First let’s see one old way of doing it. If we assume that you’ve created a PCL project then you will have four projects to start with and it will look something like this.
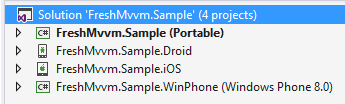
There is one shared project which, ideally, will contain all of your app logic and three platform specific projects. Depending on your preference you might be doing your layout in code or create them in XAML. I like to do the layout in XAML, which is actually a big plus if you’re going to want to use MVVM. Although you could still define your pages in code, but as you might have discovered by now: I’m trying to encourage you to use XAML ;) .
In the portable project I have a Pages folder which holds all of the pages for my app. Imagine a simple tabbed app. I would have one main page which specifies the different apps and one or more pages that hold the content of my tabs. So my app would pretty much look like this.
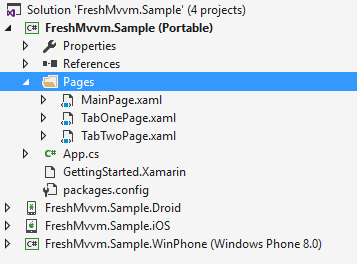
Nothing fancy, also in the XAML files nothing wild is going on, just a definition of how the tabs should look like.
// MainPage.xaml
<?xml version="1.0" encoding="utf-8" ?>
<TabbedPage xmlns="http://xamarin.com/schemas/2014/forms"
             xmlns:x="http://schemas.microsoft.com/winfx/2009/xaml"
             xmlns:pages="clr-namespace:FreshMvvm.Sample.Pages;assembly=FreshMvvm.Sample"
             x:Class="FreshMvvm.Sample.Pages.MainPage">
  <TabbedPage.Children>
    <pages:TabOnePage Title="Hello" />
    <pages:TabTwoPage Title="unicorn!" />
  </TabbedPage.Children>
</TabbedPage>

// TabOnePage.xaml
<?xml version="1.0" encoding="utf-8" ?>
<ContentPage xmlns="http://xamarin.com/schemas/2014/forms"
             xmlns:x="http://schemas.microsoft.com/winfx/2009/xaml"
             x:Class="FreshMvvm.Sample.Pages.TabOnePage">
  <Label Text="Hello" VerticalOptions="Center" HorizontalOptions="Center" />
</ContentPage>

// TabTwoPage.xaml
<?xml version="1.0" encoding="utf-8" ?>
<ContentPage xmlns="http://xamarin.com/schemas/2014/forms"
             xmlns:x="http://schemas.microsoft.com/winfx/2009/xaml"
             x:Class="FreshMvvm.Sample.Pages.TabTwoPage">
  <StackLayout>
    <Label Text="unicorn!" VerticalOptions="Center" HorizontalOptions="Center" />
    <Button Text="Show me!" Clicked="Button\_OnClicked"></Button>
  </StackLayout>
</ContentPage>
To be complete, let’s run this sample and see how it looks like for the non-geeks among us.
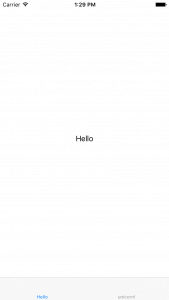
This is probably how you are used to do it, define some properties right in your screen and when something needs to happen, find the right event and do your thing!
While this works perfectly, it isn’t recommended in terms of the reusability and maintainability of your code. This is where MVVM comes in.
…In with the new! #
As a modern software developer you want to keep your UI as clean as possible and doing just UI stuff. The same thing goes for your business logic. To achieve that, using MVVM can help you! Let’s just dig in and I’ll explain along the way.
First lets get the NuGet package installed into our shared project.
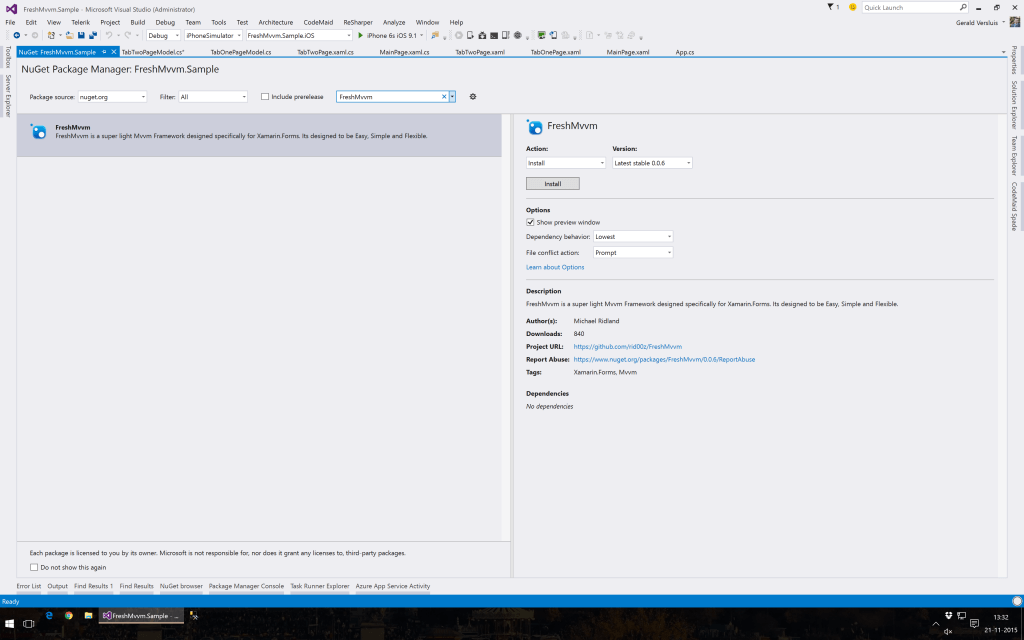
As I mentioned earlier, FreshMvvm works convention-based. So first thing I will do is create a PageModels folder and create my PageModels, these have to inherit from the FreshBasePageModel. Note; FreshMvvm does not have the ability to search in subfolders (for now) so just put your PageModels in the PageModels folder.
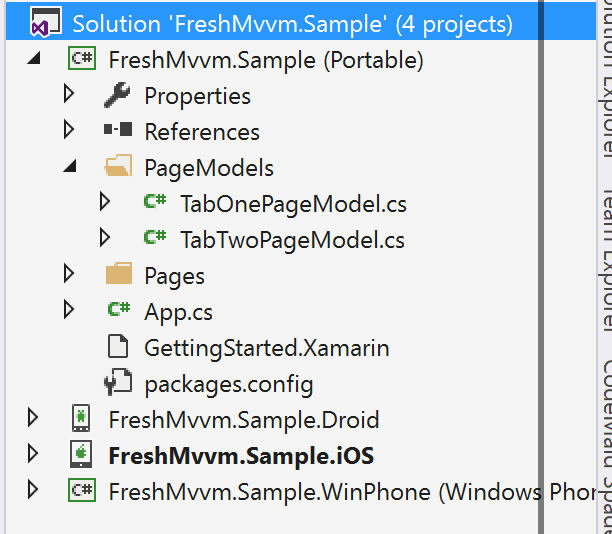
As you can see I’ve already added the PageModels for my two tab pages. Inside is nothing fancy, just the class definitions, of course inheriting from the FreshBasePageModel and some properties.
namespace FreshMvvm.Sample.PageModels
{
    public class TabOnePageModel : FreshBasePageModel
    {
        public string HelloText
        {
            get
            {
                return "Hello";
            }
        }
    }
}

namespace FreshMvvm.Sample.PageModels
{
    public class TabTwoPageModel : FreshBasePageModel
    {
        public string UnicornText
        {
            get
            {
                return "unicorn!";
            }
        }
    }
}
To have our pages use these properties we can use the built-in binding of Xamarin.Forms, you may already know them if you’ve used WPF or Silverlight before. Here is how we change our XAML pages accordingly.
<!-- TabOnePage.xaml -->
<?xml version="1.0" encoding="utf-8" ?>
<ContentPage xmlns="http://xamarin.com/schemas/2014/forms"
             xmlns:x="http://schemas.microsoft.com/winfx/2009/xaml"
             x:Class="FreshMvvm.Sample.Pages.TabOnePage">
  <Label Text="{Binding HelloText}" VerticalOptions="Center" HorizontalOptions="Center" />
</ContentPage>

<!-- TabTwoPage.xaml -->
<?xml version="1.0" encoding="utf-8" ?>
<ContentPage xmlns="http://xamarin.com/schemas/2014/forms"
             xmlns:x="http://schemas.microsoft.com/winfx/2009/xaml"
             x:Class="FreshMvvm.Sample.Pages.TabTwoPage">
  <StackLayout>
    <Label Text="{Binding UnicornText}" VerticalOptions="Center" HorizontalOptions="Center" />
    <Button Text="Show me!" Clicked="Button\_OnClicked"></Button>
  </StackLayout>
</ContentPage>
Notice how the Text attribute of our Labels have gone from a static text to a Binding on our PageModels. The button on the second Page hasn’t changed yet, I’ll come to that later on.
If we would now run our app you would see nothing. That is because there is no coupling between the Page and PageModel yet. Another great thing about FreshMvvm is something called PageModel-to-PageModel navigation. So in code, you define which PageModel you want to show to the user and the framework automagically (by name, as we know now) finds the according View and shows it to the user. By doing the navigation this way it also does the work for us to data-bind the Model to our View and thus filling it with data. If you want to see more about data-binding, see my vlog on this subject.
To make this work we have to open up the App.cs and create a page through FreshMvvm.
public App()
{
   // The root page of your application
   var mainPage = new FreshTabbedNavigationContainer();

   mainPage.AddTab<TabOnePageModel>("Hello", null);
   mainPage.AddTab<TabTwoPageModel>("unicorn!", null);
   MainPage = mainPage;
}
There are a few default page types that come with FreshMvvm out of the box, the FreshTabbedNavigationContainer is one of them. This are predefined pages which most importantly define your layout and knows how to handle the navigation within your app.
Other predefined pages are: FreshNavigationContainer and the FreshMasterDetailNavigationContainer. For details on how they work exactly and how to implement you own I refer you to a blogpost by Michael himself.
Unfortunately I haven’t found a way to create a XAML-based container page. If you happen to know how, please let me know!
Now when we run our app, we see the same result as we did before, but we know that it’s a whole different show now. Instead of having to update our objects ourselves it all goes through binding, and even the binding to the view is done for us now! Awesome!
The last thing I promised have to explain to you is the button. If you’re not used to using MVVM you probably stuff everything behind events of controls and do your stuff there. When you start using MVVM that should change. Everything in your UI is based on (bindable) properties. So for the button we can use a property which is a Command. Which is pretty awesome because you can use it to execute the code-behind your button! It also has some other perks, but you can find those out for yourself!
Let’s see how to bind a Command to our Button.
First, lets modify our TabTwoPage.xaml again
<?xml version="1.0" encoding="utf-8" ?>
<ContentPage xmlns="http://xamarin.com/schemas/2014/forms"
             xmlns:x="http://schemas.microsoft.com/winfx/2009/xaml"
             x:Class="FreshMvvm.Sample.Pages.TabTwoPage">
  <StackLayout VerticalOptions="Center" HorizontalOptions="Center">
    <Label Text="{Binding UnicornText}" VerticalOptions="Center" HorizontalOptions="Center" />
    <Button Text="Show me!" Command="{Binding ShowUnicornCommand}"></Button>
  </StackLayout>
</ContentPage>
Notice how I replaced the Clicked event with the Command property.
But what does the implementation of the Command look like?
For this we need to go to our TabTwoPageModel.cs because of our naming conventions (you remembered right?) and create a property like this.
public class TabTwoPageModel : FreshBasePageModel
{
   public string UnicornText
   {
      get
      {
         return "unicorn!";
      }
   }

   public Command ShowUnicornCommand
   {
      get
      {
         return new Command(() =>
         {
            CoreMethods.PushPageModel<UnicornPageModel>("Unicorn.png", true);
         });
      }
   }
}
There are probably a few things to explain here. First, I’m using an anonymous method here inline. You could also choose to create a separate method for it. Second; where did that CoreMethods come from all of a sudden?!
This is also something that is provided by the FreshMvvm framework. This static class gives you some basic (or core if you like) methods for navigating through your app. Like I’ve mentioned before you can navigate by PageModels and the framework will find the right View for you. Also you might like to show some alerts, etc. this is done through the CoreMethods as well.
Back to my shiny new Command. With this I tell my app to push a PageModel onto the NavigationStack and I specify an object that is given to the PageModel that is resolved to be. Lastly the boolean tells the screen if it is supposed to be modal or not.
Before I will go and run it now to see what happens there is one last thing that I want to show which are the methods you can override from the FreshBasePageModel in your own PageModel. The one I will use right now is the Init method. The Init method takes an object parameter so it can basically be anything. As you might have guessed this is the object that in my case is “Unicorn.png”. But this might as well have been a complex, lets say, Customer object which I provide to the customer detail screen for viewing.
public class UnicornPageModel : FreshBasePageModel
{
   public string ImagePath { get; private set; }

   public override void Init(object initData)
   {
      base.Init(initData);

      var imagePath = initData as string;

      if (string.IsNullOrWhiteSpace(imagePath))
      {
         CoreMethods.DisplayAlert("Error!", "Not an image path!", "OK");
         return;
      }

      ImagePath = imagePath;
      RaisePropertyChanged("ImagePath");
   }
}
So here you see how I have overridden the Init method. There is some error handling in here and eventually I set my data-bound property ImagePath. This way you can provide your screen with the necessary object. Also there is a ReverseInit, which does the inverse. That method is called when I pop this screen (of course by the means of the CoreMethods) so you could do something with the returned object, like save your changed Customer details. Besides the Init and ReverseInit there are also methods that are automagically wired to the ViewIsAppearing and Disappearing, which do what you might expect.
To finish this post lets have a looksy at the result… Also the sample code for this project can be found on GitHub.