Push notifications with Xamarin - iOS

As promised in my previous post I will continue this series with implementing the app code, in this case iOS. Fortunately, this is the hardest one so it only gets easier from here!
Be prepared… #
Before we do anything there is a little preparation we need to do. On the server side a little Azure magic which is needed for all our apps, on the client side we need to go into the Apple Member Center and juggle around with some certificates. Nothing we can’t handle, you’ll see!
Azure and Apple certificates juggling #
In the Azure console we’re going to create a new Notification Hub. We only need to do this once for all of our apps. Per app we need to do some additional configuration, but that’s peanuts.
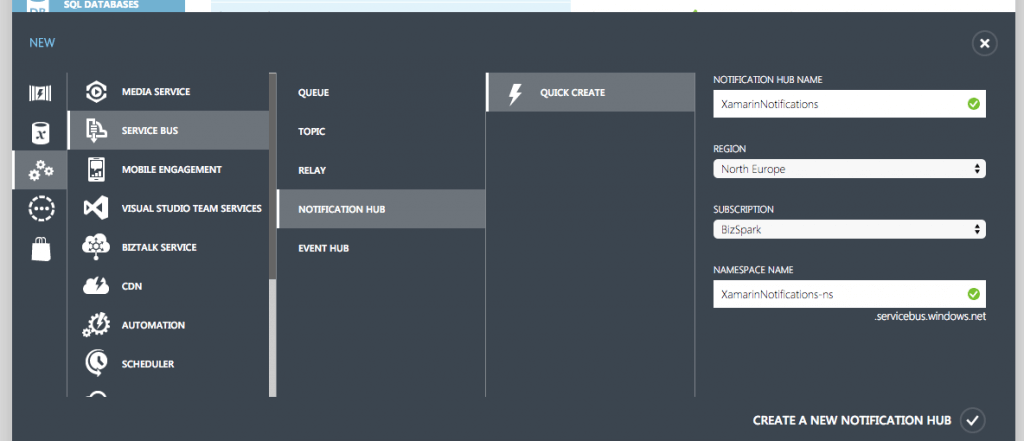
I’m assuming you already have an account and basic knowledge of how Azure looks and works (or you know how to find the resources to teach yourself), so log in to the portal and hit that ‘New’ button at the bottom. Then select App Services > Service Bus > Notification Hub > Quick Create. Enter a name of your choosing, the region where you would want to host your hub and the rest which should be self-explanatory. When you’re done click the Create button, wait a little, and voila! We’re good to go!
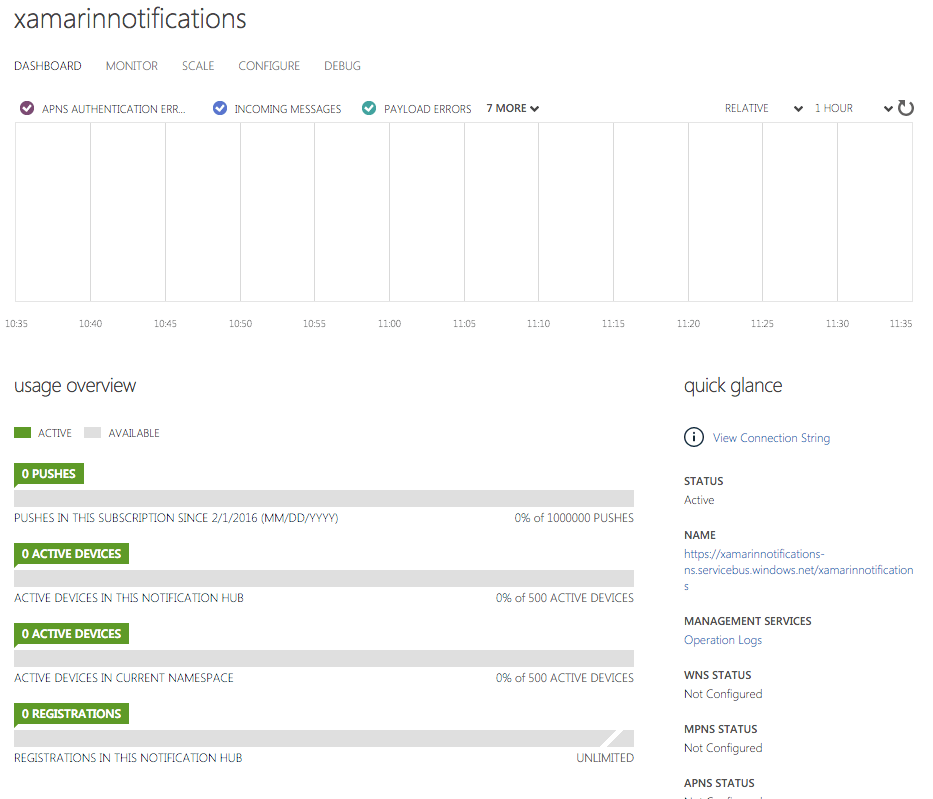
Ok, almost good to go. If you’d like you can click around a little, click on the ‘XamarinNotifications-ns’ (or whatever you may called it) column, then the ’notification hubs’ tab and click the notification hub that’s in there. This is the actual Notification Hub we’ve just created. At the centre top and bottom you will find all kind of metrics about your hub; how much devices are registered, how much push notifications have been sent, how much succeeded, how much failed, etc. On the right side under ‘Quick glance’ there is some status messages and you’ll notice that it says ‘Not Configured’ a whole lot!
At the bottom you’ll notice a button which says ‘Connection Information’, click that and note the Connection String that is listed after ‘DefaultListenSharedAccessSignature’.
In my previous post I have told you that the Notification Hub provides you with a single point of entry to send your notifications instead of having to send them to all the separate push servers of Apple, Google and Microsoft. The thing still have to do is tell the Notification Hub which credentials to use to forward your push messages to those separate services for you. Let’s get that over with right now.
In another browser tab head over to the Apple Member Center and navigate to ‘Certificates, Identifiers & Profiles’. If you haven’t done so go into ‘Identifiers’ first and create a new app. Choose a name, app ID and don’t forget to check ‘Push Notifications’ under ‘App Services’. Now hang on to your hat, the juggling begins.
Let me explain a bit about how Apple wants you to use push notifications. The authentication is arranged by certificates and both the app and server need to use the same certificates in order to send or receive push notifications. First we need to create a certificate, with that we can create a provisioning profile. This is used to provision your app. To request a certificate in the first place you need to export a key from your Mac to verify you’re you! To top it of, Azure wants that same certificate, but in another format..
Let’s just get it over with!
Go to your Mac and open the Keychain Access.
In the Keychain top menu go to Keychain Access > Certificate assistent > Request a Certificate From a Certificate Authority. The certificate assistent should now open. In this screen enter your email address that is associated with you Apple developer account, in Common Name enter your name for this key and set the ‘Request is’ to ‘Saved to disk’. When you now click the Continue button you will be asked where you would like to save this so-called CSR (.certSigningRequest) file, you’ll need this later so save it somewhere you can find it.
Go back to the Apple Member Center but this time go to the ‘Certificates’ section. Click the plus sign at your top right side to add a new certificate. You will have a lot of choices on what type of certificates you can create. Luckily for us Apple has decided to create a push notification certificate which can be used for development (called sandbox) and production (note: you still can’t receive production notifications on a development app). So under ‘Production’ choose the ‘Apple Push Notification service SSL (Sandbox & Production)’ option, then Continue at the bottom. At the next screen select the App Id we have created earlier and click Continue again. So far, so good!
Now you’ll get a screen which basically describes how to get the CSR file from your Mac which we’ve already done so we can skip that one and in the next screen you can upload the earlier created file. So go ahead, select your file and click Generate! And there it is!
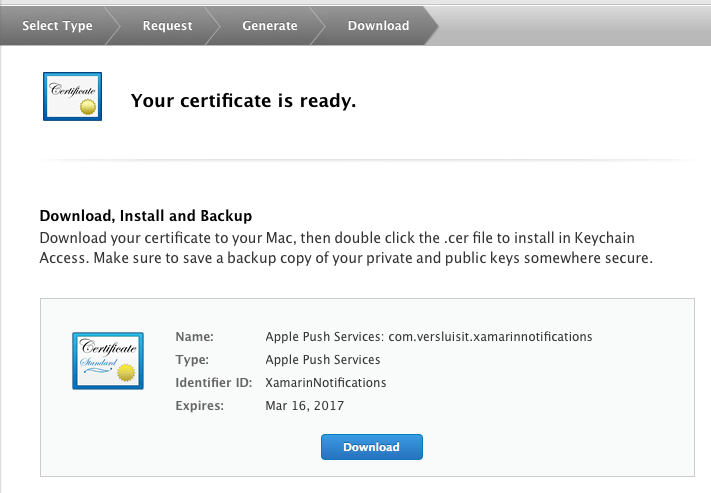
Do as it says; download it and put it somewhere safe (you can always download it from the Member Center as well). If you lose it you will need to generate new certificates and as you should know by now: you can’t send notifications from one certificate to the other, so then you have to rebuild your app, update Azure, update your push mechanism, etc. However, as you may have noticed, you have to do this after a year anyway because this certificate expired. You might want to add this date to your calendar because after that your push stops working as well!
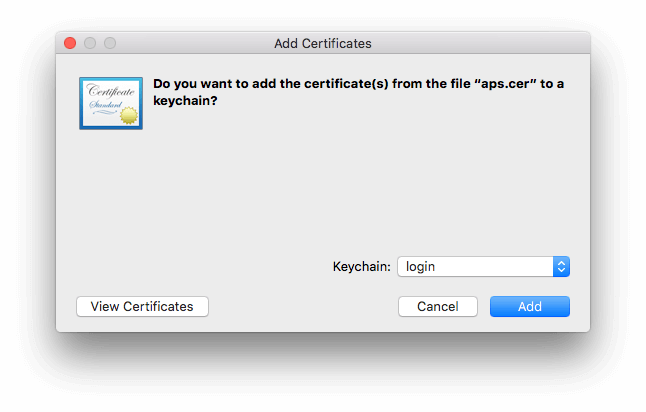
So now you have a .cer file. First click it from you Mac and add it to your ’login’ chain, basically just click ‘Add’.
For Azure we need the same certificates in pfx or p12 format, no problem for us awesome developers of course!
Just go into your Keychain again, choose the login keychain and Certifiates category and search for you app name, XamarinNotifications in our case. One result should pop up.
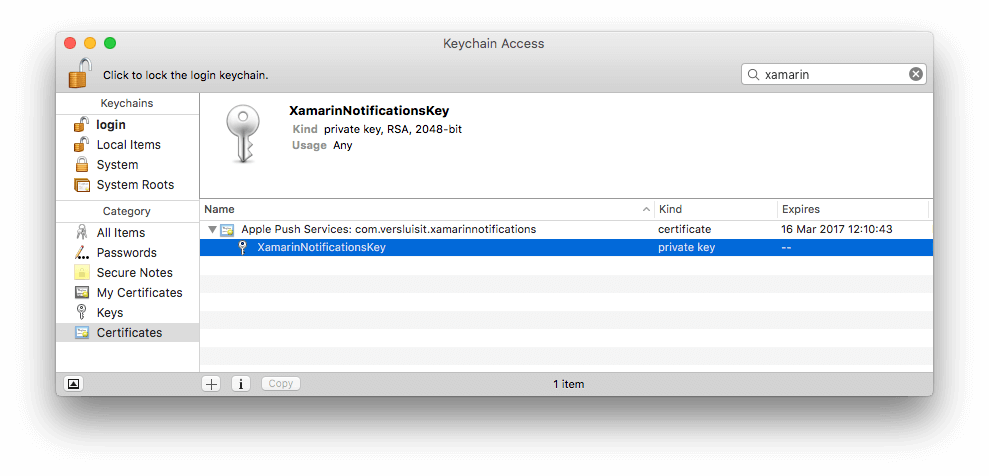
Expand the root node and right-click on our key name (notice how it is the same name as we entered earlier). Choose ‘Export “XamarinNotificationsKey”’ and you’ll see that it suggests to export it in the p12 format by default, bingo! Choose a descriptive name, a location and click Save. Now you’re being asked to enter a password. This is totally up to you. Of course you should choose a secure one, also remember this one, if you need it later on and don’t have the password, you’re screwed. For now we’re going to use it to import it into Azure.
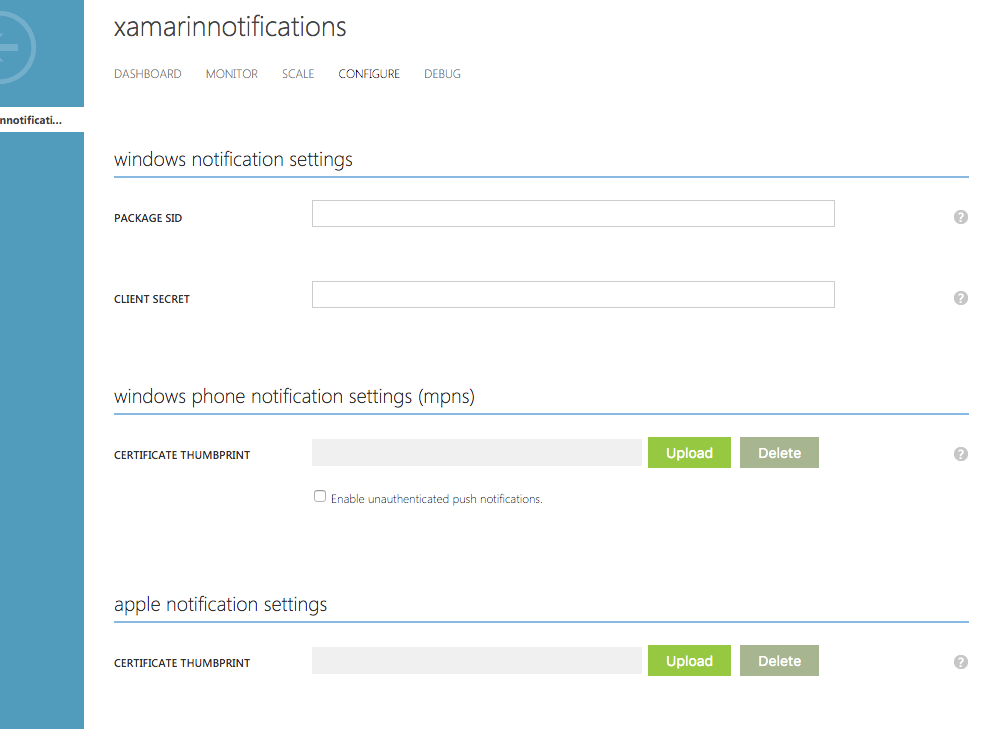
Choose the password and continue, now you’ll have to authorise the export by entering your Mac user password and presto! We have a p12 file! Congratulations! Last thing we need to do is put it in Azure. Go back to the Azure portal and into your Notification Hub (not the service bus with the ‘-ns’ suffix), head over to the configurations tab and find the ‘apple notification settings’ header. Click the Upload button, select your shiny new p12 file, enter the password you’ve entered about a minute ago and leave the setting to Production for now. After you’ve saved this screen you should see a thumbprint in the input box.
That’s it! Azure is ready for action!
Finally, take note that there is a ‘Debug’ tab at the top of this screen. We’ll use this later on to verify that our push service works.
Implementing iOS app logic #
As I’ve described in the first blog post we cannot achieve push notifications without implementing some platform specific code. Again; you could make use of this fine plugin but I’d recommend do do it manually the first time to get a feeling about how it all fits together. That way you’ll know what is going on where, which makes debugging a lot easier along the way.
A note upfront: iOS is the only one who doesn’t allow for testing push notifications on the simulator. So if you would want to see this in action, you are going to have to install you app on a physical device!
For this app I have created a cross-platform PCL solution in Visual Studio so that I also have a Windows Phone app which I will describe later on. You can find the sample project on my GitHub here. Actually the main file we need to edit is the AppDelegate.cs in the iOS project.
There are three events which we need to implement here in order to make push notifications work. There are a couple more which have to do with (local) notifications. But these are the most important ones.
// We’ve successfully registered with the Apple notification service, or in our case Azure public override void RegisteredForRemoteNotifications(UIApplication application, NSData deviceToken) {
}
// We’ve received a notification, yay! public override void ReceivedRemoteNotification(UIApplication application, NSDictionary userInfo) {
}
// Something went wrong while registering! public override void FailedToRegisterForRemoteNotifications(UIApplication application, NSError error) { var alert = new UIAlertView(“Computer says no”, “Notification registration failed! Try again!”, null, “OK”, null);
alert.Show(); }
I’ve already implemented the FailedToRegisterForRemoteNotifications. It just shows an alert to the user that the registration failed. Of course in a real life app you might want to provide a more descriptive message, or notify the user in some other way, or not at all! This is also a good point to include some Xamarin Insights.
The ReceivedRemoteNotification event is invoked when your app is in the foreground, so you should handle the received notification here in a way that the user gets informed. For now I will implement this with an alert again. You could also choose to create a separate screen for notifications so the user can read them back, or show a toast with the UserDialogs plugin, etc.
public override void ReceivedRemoteNotification(UIApplication application, NSDictionary userInfo) { NSObject inAppMessage;
var success = userInfo.TryGetValue(new NSString("inAppMessage"), out inAppMessage);

if (success)
{
    var alert = new UIAlertView("Notification!", inAppMessage.ToString(), null, "OK", null);
    alert.Show();
}
}
Notice how I try to parse some object called ‘inAppMessage’. For a moment lets look at how the Apple notification payload looks like.
Notification payload #
{“aps”:{“alert”:“Hi! I’m a notification!”}}
See anything familiar? That’s right, it’s just plain old JSON! There are some default options you can leverage here. When we would send this notification body - as we will later on - you would see a notification coming in with ‘Hi! I’m a notification!’.
With extra tu-du-du sound! #
If you would want to play a sound (or vibrate on iPhone when sound is turned off) you can add the ‘sound’ key.
{“aps”:{“alert”:“Hi! I’m a notification!”, “sound”:“default”}}
This will play the infamous Tritone sound tu-du-du! There are also options to provide another or your own custom sound! Check out the Apple documentation for this.
If you’d want to just show this message, swap out the ‘inAppMessage’ string value for ‘alert’ and it will show you that text. But if you would want to show a different message in-app than err.. out-app, you could do it like I did above. Just append an in-app message to your JSON like so:
// Note that the ‘inAppMessage’ key is outside of the ‘aps’ key! {“aps”:{“alert”:“Hi! I’m a notification!”}, “inAppMessage”:“Hello there! I’m a in-app notification!”}
Showing a badge value #
To show a badge (the red icon with a number) on your app icon you can add the badge key like this:
{“aps”:{“alert”:“Hi! I’m a notification!”, “badge”:42}}
Just don’t forget to reset it when the user has opened the app by adding this in your AppDelegate
public override void OnActivated(UIApplication uiApplication) { UIApplication.SharedApplication.ApplicationIconBadgeNumber = 0; }
If you have some other way of determining that the user has read the notification apply the line there. Or if you have determined from the server-side that you can reset the badge send another notification with the badge value set to zero.
Implementing cont’d #
Let’s get back implementing. The last event we need to implement is RegisteredForRemoteNotifications. This event is fired when we are registered end ready to receive notifications. What happens when you have registered is you get back the registration id from Apple in this event. So we want to catch that id, transform it a little and send that to Azure as a unique identifier for our device. Also you might want to save the id locally so we can check against Azure if the device is registered or not. If you need an easy way to save settings, have a look at the Settings plugin.
Before we are going to implement our last event we need to add the Azure Messaging component by Xamarin to our project. Right-click the ‘Components’ node in you iOS project and choose ‘Get more components…’. Find the Azure Messaging component and add it to your app.
Keep in mind that all roads lead to Rome. So you could also have created a Mobile Service within Azure which is a more extensive Azure package which offers more than just notifications, then you could use the WindowsAzure.MobileService NuGet package i.e.
A implementation of this event could then look like this.
public override void RegisteredForRemoteNotifications(UIApplication application, NSData deviceToken) { // Modify device token for compatibility Azure var token = deviceToken.Description; token = token.Trim(’<’, ‘>’).Replace(" “, “”);
// You need the Settings plugin for this!
Settings.DeviceToken = token;

var hub = new SBNotificationHub("Endpoint=sb://xamarinnotifications-ns.servicebus.windows.net/;SharedAccessKeyName=DefaultListenSharedAccessSignature;SharedAccessKey=<your own key>", "xamarinnotifications");

NSSet tags = null; // create tags if you want, not covered for now
hub.RegisterNativeAsync(deviceToken, tags, (errorCallback) =>
{
    if (errorCallback != null)
    {
        var alert = new UIAlertView("ERROR!", errorCallback.ToString(), null, "OK", null);
        alert.Show();
    }
});
}
You can get the url and key from the Azure portal. Remember I told you to note that Connection String in the Azure portal? You need to fill it in here as the first parameter of the SBNotificationHub constructor. The second parameter is the Notification Hub name, this should be the part after ‘sb://’ without the ‘-ns’ suffix.
To request the users permission for sending notifications implement the code below. You can do it in your FinishedLaunching in the AppDelegate so the users gets prompted at startup, or at some settings screen where you let the user decide if they want to receive push messages. The screen will only popup once, after that the user has to go to the Settings app to change the setting, or if your app is removed and installed again the message will show again.
// registers for push var settings = UIUserNotificationSettings.GetSettingsForTypes( UIUserNotificationType.Alert | UIUserNotificationType.Badge | UIUserNotificationType.Sound, new NSSet());
UIApplication.SharedApplication.RegisterUserNotificationSettings(settings); UIApplication.SharedApplication.RegisterForRemoteNotifications();
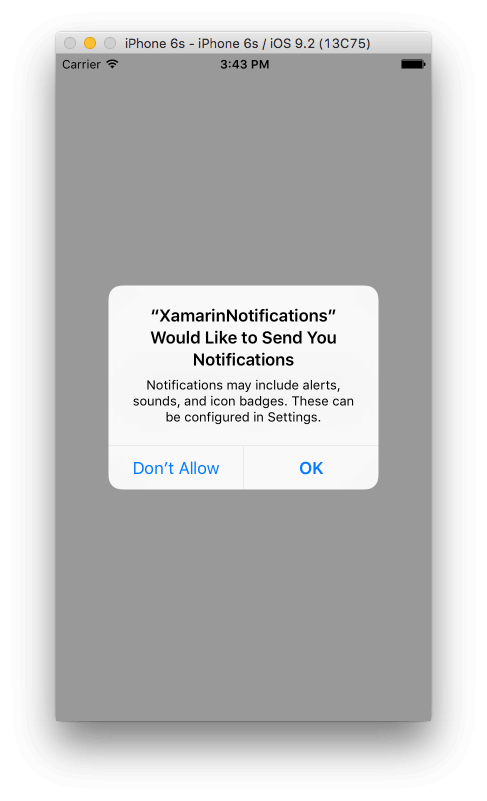
While this screenshot is from the Simulator, remember that you cannot test push notifications on the Simulator. After the user has pressed OK in this dialog the RegisteredForRemoteNotifications is triggered and the returned token is send to Azure for registration. This process will repeat at every startup of the app. A token has a expiration which is a maximum of 90 days. If you have no special requirements this is nothing to worry about and Azure will take care of it for you.
When testing in the simulator however will trigger the other possible scenario; when the user pressed OK and the registration fails the FailedToRegisterForRemoteNotifications is invoked.
Deployment #
Onto the final step; deployment of our app to our physical device so we can see this bad boy in action!
I’m presuming that you know how to create one and how to include your own test device. If not, there is a good guide for that in the Xamarin documentation.
After you’ve done so run the app on your device and get back to that Debug tab in the Azure portal I’ve told you about earlier. Set the platform to iOS and hit the Send button at the bottom. After Azure took a few moments you should see the the test message on your device.
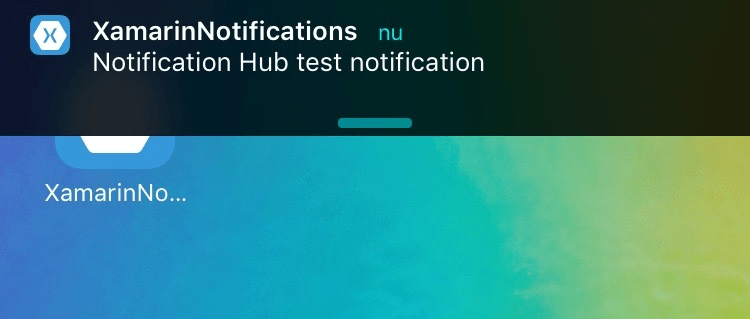
Whoa, awesome no?!
Experiment a little with the different payloads and the in-app notifications etc. Also pay special attention to the little log table on the bottom of the debug tab. If the notification isn’t coming up, see if it says if the notification has been sent or that there aren’t any registrations.
Pfew! Now that was a whole lot to take in right? Fortunately the Azure configuration is mostly done and only needs a bit of tweaking for Android and Windows Phone, so next posts will be a lot shorter.
Remember to checkout the sample code on GitHub here.
Also look into… #
There is a bunch of other stuff to look into! I’ll list a few of them below with links that have more info. The rest is up to you! Don’t hesitate to ask me anything or tip me off if you miss anything.
Local notifications #
There is also a thing called local notifications, this can be used to ‘send’ a notification which isn’t triggered remotely. This is sometimes used by apps to prevent users from not coming back to your app. So when a user hasn’t started the app in a while a notification is shown to pursue the user to start the app again. Also you can schedule them, so if your app does something with dates you could schedule a local notification to remind the user. The Xamarin documentation has a nice walkthrough about this.
While this post is focused on iOS, this concept exists on Android and Windows Phone as well.
Interactive notifications #
Then we have interactive notifications. These are the action buttons that show under a notification when you slide it down or to the left in the notification center. With interactive notifications you can enable the user to invoke a specific action from your notification. More information on this can be found here, but note this is not Xamarin. You’ll have to translate it to C# yourself. If there is demand for it I’ll look into implementing it later.
Thats it for now, thanks for reading and stay tuned for the Android flavored post!