Push notifications with Xamarin – Server

Now that we have three apps which implement push notifications, we also want to send some messages to the user!
Until now we have done this by using the Azure portal but this is very limited and you’re not going to want to check your database for updates and sent out the right push notifications manually.
There are a lot of ways to send notifications not only the way that you might trigger them, but also how you communicate with your Azure Notification Hub. Your sending mechanism might be from a console application which runs scheduled (on a server or have a look at Azure WebJobs), or directly following an action which might occur on your web variant, or even when a certain action on your database happens. These are just a few of the possibilities.
This is made possible by the fact that you can talk to your Notification Hub in different ways i.e. Microsoft provides you with the libraries to communicate through the Azure API and another, much easier way, is to send a request to the REST API that is associated with your hub.
Creating a console application #
I find that a most comprehensive solution is to build a console application. This is easiest to trigger yourself, can be ran scheduled both on a server, locally and in Azure. I didn’t need real-time notifications to this day, so a intervalled job is just fine.
We start with creating a plain old simple console application from Visual Studio. Then go to the NuGet packages for this project - which I named XamarinNotifications.Server - and install the ‘Microsoft.Azure.NotificationHubs’ one.
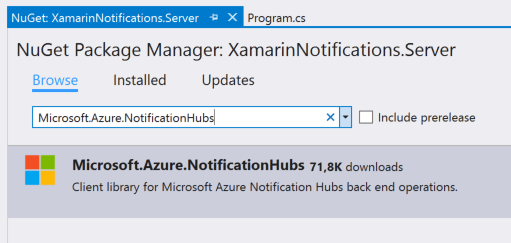
As you might have guessed by now, this is a very convenient package to communicate with you NotificationHub. Now the rest of the code is pretty straight forward. There is a ‘NotificationHubClient’ object which can create an instance by taking a connection string.
Azure ahead #
So go over, once more, to your Azure portal and find the connection string of your service bus. It’s (still) under the button at the bottom which says ‘Connection information’. Beware; the one of your service bus! Which is the name of your Notification Hub with the ‘-ns’ postfix. Also remember your Notification Hub name - without the ’ns’ postfix - because you’re going to need that as well.
Writing the server #
Without further ado, let us have a look at the code:
private static void Main(string[] args)
{
// Define the notification hub.
// TODO Add your own connectionstring and hub name here
var hub =
NotificationHubClient.CreateClientFromConnectionString(
“
// Define an iOS alert..
var iOSalert =
            "{\\"aps\\":{\\"alert\\":\\"Hello. This is a iOS notification! Tada!\\", \\"sound\\":\\"default\\"}}";

// ..And send it
hub.SendAppleNativeNotificationAsync(iOSalert).Wait();

// Define an Anroid alert..
var androidAlert = "{\\"alert\\": \\"Can I interest you in a once in a lifetime push notification?!\\", \\"title\\":\\"Ding, dong!\\"}";

// ..And send it
hub.SendGcmNativeNotificationAsync(androidAlert).Wait();

// Define an Windows Phone alert..
var winPhoneAlert = "<?xml version=\\"1.0\\" encoding=\\"utf-8\\"?>"
    + "<toast>"
    + "<visual><binding template=\\"ToastText01\\">"
    + "<text id=\\"1\\">Peek-a-book</text>"
    + "<text id=\\"2\\">This is your friendly neighborhood message!</text>"
    + "</binding>"
    + "</visual>"
    + "</toast>";

// ..And send it
hub.SendWindowsNativeNotificationAsync(winPhoneAlert).Wait();
}
It should be pretty much self-explanatory. First a Azure client is created with the connection string and from there you define the payloads of the different platforms and send them to the hub. And that is it!
A bit more in-depth #
Come to think of it; I don’t think I did mention it in my Windows post, so I’ll do it now: have a good look at the payload options you have while creating a Windows push notification. There are a lot of options there to create a look and feel that you want. You can find all the info about that here.
Only thing that might look weird is the ‘.Wait()’ calls. There are different ways to solve this, but it prevents the process of ending prematurely. A console application runs, and just terminates at the end. So if I would run these bad boys asynchronously, the process would reach the end, terminate while also terminating all the threads that are sending notifications to Azure.
The send methods also have overloads to send the notifications to specific tags. This way you can reach a specific group of people or maybe even one person.
Now this process can be used in a variety of ways!
Like I mentioned in the beginning another way to connect with you Notification Hub is through a REST API. While this has no difference to the end-user it is completely different for the developer. I’m going to assume that since you are a Xamarin developer you know how to manage a REST API so I’m not going to go in detail there. You can find the documentation on this here. The only obstacle here is that you need to generate a ACS token for authorization which can be a bit tricky but isn’t impossible.
Like all other code you can also find this console tool on the associate GitHub. If you have any further questions don’t hesitate to drop me a line!