Setting up shop for Xamarin

Ok, so Xamarin is my weapon of choice. Now what?
The plan of approach seemed pretty simple upfront:
- Get Xamarin
- Get developing
- Get filthy rich
Using the words ‘seemed’ and ‘upfront’ together might already give away the clue a little bit doesn’t it? It wasn’t as easy as I thought..
The ingredients #
First off; how to get my hands on the goods? Heading to xamarin.com seems like a good place to start, and it was! As expected of a good developer I just skipped the ‘read the manual’ part and scanned the page for a download link.
Fill in some personal details.. Download.. Install.. AWESOME! Run, build Hello World app.. Wait. Xamarin Studio? Wasn’t there Visual Studio support? Although I am convinced Xamarin Studio is a decent product, one of the advantages was that I could use all of my existing and familiar tools!
Maybe let’s back-up a little.. Take a deep breath, no development for today, first a little research.
After some more examination on the Xamarin website I discovered that to fulfil all of my needs I would at least need a Business license.
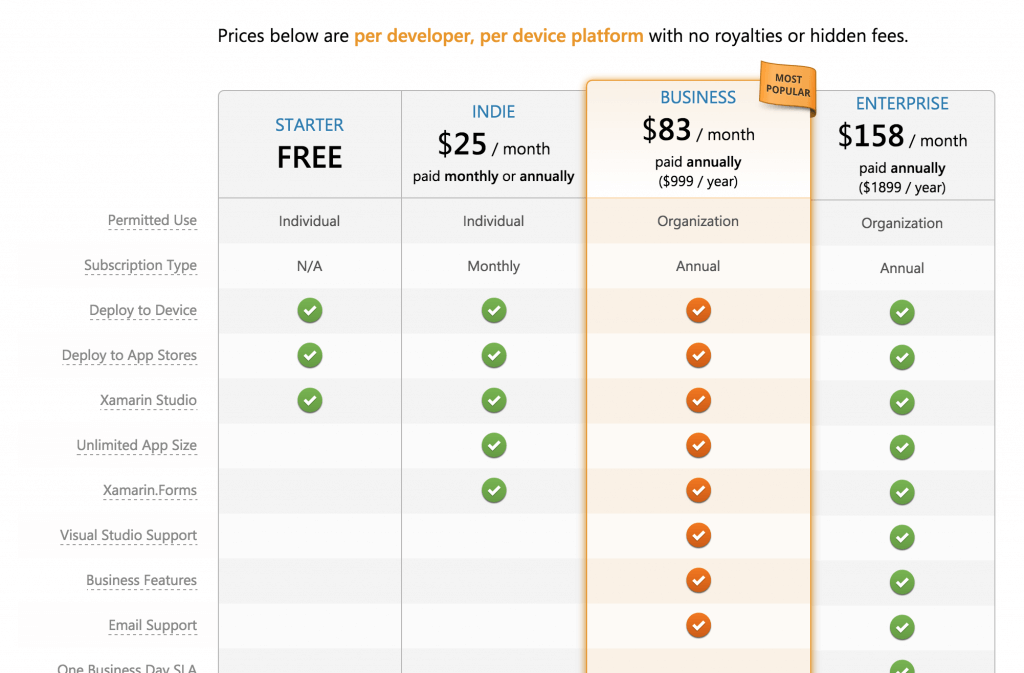
Wow. That’s a hefty price for just toying around. Although I have big plans using Xamarin, creating apps, specialising, teaching others, I am not nearly there yet. Then this is a big investment upfront. After consulting my employer at 4DotNet if he was willing to invest and also the nice folks at Xamarin we were able to work out a plan. I would get a trainers license at a reduced cost (whopping 90% off!) and my employer was so nice to pay the license costs for me as well as providing the necessary MacBook (AWESOOOME!).
Ok, all covered there. It took a few weeks to get everything delivered, but finally my precious MacBook arrived, Xamarin license was all ready to go. Let’s do some setting up!
The set-up #
Operating systemception #
At this point I already had minor experience with a Mac and watched some Xamarin training footage from other speakers. Because of that I knew that the best way to go was running Mac OS physically and Windows virtually. Or even better, Windows with Bootcamp. Why, you ask? With bootcamp you can create a dual boot machine with both Windows and Mac OS. This gives me the advantage of running directly on Windows, giving me all the speed and memory physically when I don’t need to test my iOS app right away. Also, I can access my Bootcamp drive virtually with VMWare Fusion and run Visual Studio as if it were on my Mac. Win-win I would say.
After three (re)installs of Windows I finally got my setup right - confusing Parallels with Fusion, not installing Windows 8.1 Enterprise but another edition which left me without Hyper-V - and could proceed with installing the good stuff.
Development environment #
So I want to develop from within Visual Studio and create apps for iOS, Android and Windows Phone. With some common sense I figured that I would need to install on Windows:
- Visual Studio (with Windows Phone SDK)
- SQL Server (while I’m at it)
- Xamarin
And on the Mac side:
- XCode (needed mainly for the iOS emulator)
- Xamarin
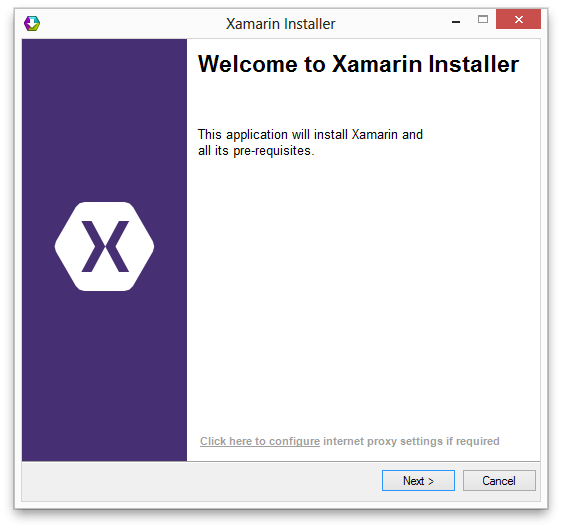
Setting up these things are pretty straight forward, and I assume you have seen some installers before. So just next, next, next, finish ahead, wait a whole bunch and be done with it!
Before you can work with Xamarin, be sure to login to the portal and add your developer to the license. In Visual Studio (and Xamarin Studio) you will need to login in order to activate your license.
Ready, set, go! #
Good. I’ve set things up. Time to get some work done!
In later blogs I will describe more about development (since it is the sole purpose of this blog..). For now, I will just wrap up about setting up.
Windows Phone emulator #
While developing I have come across some troubles regarding to emulators. Like I’ve briefly mentioned before; you’ll need Windows 8.1 Pro or Enterprise on a 64-bits machine. This is needed to be able to run the Windows Phone emulator. More on the prerequisites and how to do so, check out this blog on technet. The blog describes a physical machine. Using Fusion you will also have to enable virtualisation.
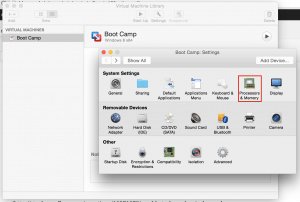
You can do this by going to your virtual machine settings while it is powered off, then choosing ‘Processors & Memory’.
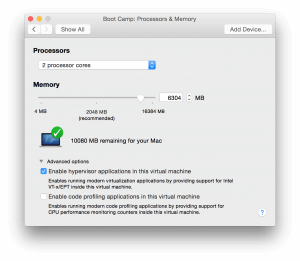
There, at the bottom, click ‘Advanced options’ and check ‘Enable hypervisor applications in this virtual machine’ like underneath.
Unfortunately this isn’t the only thing you have to do. Also you will have to edit the .vmx file. If you are a Mac OS n00b like myself, you’ll find yourself searching a little bit. I did it like this; in the Virtual Machine library, right-click your machine and choose ‘Show in Finder’. This opens up the virtual machine on your file system. Right-click your virtual machine in the Finder and click ‘Show Package Contents’. This opens up the files within the virtual machine and there you will see a .vmx file with a name corresponding to your virtual machine name.
Open it up with a text editor and add these two lines at the very end:
hypervisor.cpuid.v0 = “FALSE” mce.enable = “TRUE”
To be completely honest; I don’t really know what it does either. But it works! Kudo’s to the people regarding to this Stack Overflow question.
Android emulator #
After watching some introduction video’s about Xamarin there were a few people saying that the stock Android emulator is slooooow and they are using Genymotion.
So, trusting that the people before have done their research, I didn’t even try the stock emulator and went straight to Genymotion.
This immediately presented me with a problem. Install Genymotion on Windows or Mac? I did both, just for the fun of it. On the Mac I wasn’t able yet to connect to it from my (virtual) Windows environment and on my (again, virtual) Windows environment I wasn’t able to start the emulator at all because.. Well. It just can’t run virtually inside a virtual machine.
Right after this I found out that Xamarin themselves are also working on an Android emulator known as Xamarin Android Player. This is just in a preview phase for now and didn’t seem to work with Windows in a virtual environment..
For now I’m switching back and forth between my physical Windows and Mac environment to develop and test on all platforms, later on I will fix the emulator issues so this will be less effort.